meyer lemon tart

We’ve made it through our 30th and 31st recipes from Claire Saffitz’s Dessert Person—the Lemon Curd, another Foundational Recipe from the book, which is then used to create the incredible filling for the Meyer Lemon Tart. The Pies and Tarts chapter continues to blow our minds!

Lauren’s Take

Yay! We finally made it to the Meyer Lemon Tart! I was very excited to do the bake this week and had been looking forward to it since Claire released the video of it on her YouTube channel. My Dad has always had a love of lemon tarts, so growing up I quickly developed a fondness myself. What’s not to love about a lemon honestly? It’s yellow, tart, sweet, bright…can’t go wrong. And then put it in a bake good? Girl, recipe for success.

The bake this week was definitely not super challenging; there are just lots of steps that need to be done ahead of time, so time management and planning (which I’m slowly getting better at) is key. The two main components for this dessert are the Sweet Tart Dough (which Julia and I have become experts at), and the Meyer lemon curd. I made both components the day before and let them chill in the fridge overnight before doing the bake.

For the lemon curd, I could not find Meyer lemons for the life of me, so I just used normal lemons instead. And then the wildest thing happened. I made the curd while watching Claire’s video for moral support and entertainment. And as I started juicing the lemons, I winced in pain because I realized I had a tiny paper cut that I didn’t know was there…only to discover 15 seconds later in the video that Claire experiences the EXACT same thing…coincidence? …Probably.

The curd starts off by combining sugar and lemon zest, and then whisking in many egg yolks to create the mixture. And you really have to whisk it. My suggestion would be not to make this recipe after an arm day, because man, you need some strength. It’s a lot of whisking and it doesn’t end for some time. Once the mixture has thickened and lightened, you whisk in the lemon juice.

You then heat it on the stove and, you guessed it, CONSISTENTLY whisk, until it begins to thicken. I used a thermometer and cooked my lemon curd to 170 degrees like it says in the book, but in all honestly, I think I could have left it longer because it seemed a bit thin in retrospect. Once the lemon curd has cooked to this point, you remove it from the heat and slowly whisk in pieces of butter one at a time. Once this has all incorporated, you add a bit of vanilla and then put it in a container to chill in the fridge.

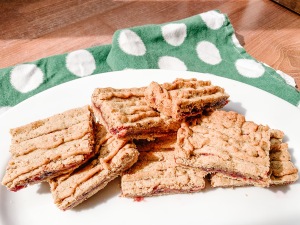
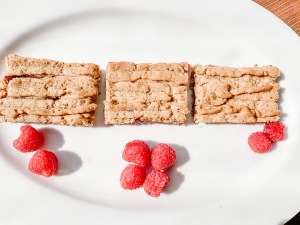
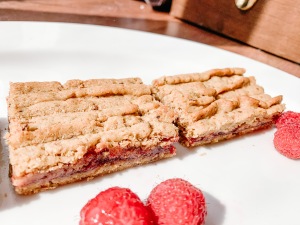
The next day, everything was chilled and ready to go so I assembled the tart! First, you fill the tart pan with your dough and parbake the crust. Once it has cooled, you add a layer of jam (I used raspberry) to the top and bake this for 5-7 minutes, just to solidify the jam so you don’t get a bunch of mixing in the layers. Once the tart has baked with the jam, you add your lemon curd mixed with a bit of plain Greek yogurt to the top, smooth it out, and then bake! I was a bit over zealous with my lemon curd so it spilled over the top a tiny bit, but it still ended up being okay! It was just a stressful trip over to the oven!

The tart bakes for about 30 minutes, and you are looking for the sides to have puffed up and the centre to have a nice wobble. I let the tart cool overnight in the fridge because I finished baking quite late. The next morning, I decorated the top, and cut into it for a casual piece of lemon tart for breakfast (why not right?!). Friends, this tart spoke to my soul. It is PERFECTLY well balanced. The addition of Greek yogurt to the lemon curd is genius and adds a perfect level of tang to the tartness to balance it out. The tart dough is a winner once again, and the cookie-like crust combined with the smooth curd is also excellent.

My boyfriend’s mom also really wanted to bake this dessert this week, so we both baked it on the same day and did a side-by-side taste test! Hers also turned out beautifully and was a bit more tart than mine. It was really cool to have an in-person comparison side by side other than just the pictures that Julia and I do each week! Thanks for joining this week Jackie!!

In conclusion, my love of the lemon tart holds true and this is 100% a dessert I would make again and again. 5 stars!

Julia’s Take

Hi friends! We’re back with another beautiful tart recipe. Do they have a name for that universal rule that you can find something in a store every time up until the moment you actually NEED it for something? Well, whatever it is it definitely applied here; there are a couple of grocery stores that seem to always have bags of Meyer lemons regardless of the season, and I thought for sure—despite the fact that it’s July and citrus is in season during the winter—that I’d be able to snatch some up for this recipe. Alas, this was not the case. I hopped around to a few different grocery stores and they were all Meyer lemon-less. So, Claire’s Meyer Lemon Tart is just a Lemon Tart today. Speaking of citrus being in season in the winter, anyone else feel like this shouldn’t be the case? Citrus is so refreshing that is always screams summer to me, so I loved that we were able to make this tart at this time of year regardless of some issues with ingredient sourcing, but I digress.

The base of this tart is the epic Sweet Tart Dough. We’ve made this so many times now (for the Salty Nut Tart, the Pistachio Linzer Tart, and the Blackberry Caramel Tart) that I feel like I’ve learned the recipe by heart. I sped through all the steps, parbaked my crust, and then realized that I had barely looked at the book. Five months in to this project and feeling like a true pro 😉

Like several of these last few recipes, once the base dough comes together the rest of the bake is super straightforward—there’s just a bit of timing involved. As my tart shell was baking, I worked on the lemon curd, which is a combination of mostly egg yolks, sugar, lemon zest, lemon juice and, once that is whipped together and slowly heated through until thick, a whole bunch of butter and some vanilla. My curd mixture felt a little loose to me once I was finished, so I was worried it wouldn’t set properly, but after the required 3 hours in the fridge, it was nice and thick and beautifully smooth.

This wait time for your curd is really the longest part of the whole process. When your curd is ready, it is mixed together with Greek yogurt. While this filling comes to room temperature, a layer of raspberry jam is spread over the base of the cooled tart shell and bakes for just a few minutes until it’s set. Afterwards, the filling is poured over and the whole tart bakes for 30 minutes until the filling has fully set, puffs up around the edges, and has a good wobble to it. There is again a bit of a wait time here, as the tart cools fully at room temperature and then chills again in the fridge for at least an hour.

The results are just perfect. The sweet tart dough is just so wonderful—it’s crisp, and buttery, and just sweet enough, and so easy to cut through. I love it so much. The thin layer of raspberry jam is also such a great addition to a lemon dessert; I love me some lemon meringue pie or a classic lemon tart, but this extra little dimension of flavour breaks up the straight tartness of the lemon perfectly. And then, of course, the curd filling is the star of the show—bright, tangy, smooth. SO GOOD. My love of lemons remains strong. I definitely plan on making this tart again this winter once Meyer lemons are in abundance and maybe also swapping out the raspberry jam for blackberry. How good would a grapefruit curd filling be too?! The ideas are swirling!

The Pies and Tarts chapter can do no wrong in my eyes and this is yet another 5-star bake for me!

Next week we’ll be taking on a bit of a challenge: it’s Tarte Tatin time!

pistachio linzer tart

Welcome back everyone, and Happy Sunday! This week’s recipe from the Pies and Tarts chapter of Claire Saffitz’s Dessert Person is the Pistachio Linzer Tart. This marks bake number 22 for us!

Lauren’s Take

Hello all! And hello to beautiful warm weather, sunshine, and the beginning of patio season in Ontario! This weekend was lovely for so many reasons; I was off call, the weather was wonderful, the streets were full of happy people eating at restaurants once more, and I got to make another killer dessert from Dessert Person (apologies for my failure to perform last week). The recipe up this week was the Pistachio Linzer Tart. This bake came at a convenient time for those of us baking in order because I had a bunch of pistachios left from the galette last week! I just want to take a quick moment to point out something obvious and that is—pistachios are expensive. I know Claire says you can sub them out for another nut, and I’m glad she does because my lord, they break the bank. Aside from this recipe sparking my frugality, I was excited because I had never made, nor heard of, a linzer tart before.

This recipe at first can seem a bit daunting. Firstly, it calls for a pastry bag which always sparks some fear for me, and the picture in the book versus how making the dessert is described was confusing to me. Her photo looked perfect and neat (as per usual), but when I was visualizing how it was going to come together based on the steps, it didn’t seem to make sense. You start off by toasting the pistachios and then combining them with flour, cinnamon, and salt in a food processor. I ended up realizing that I had some unsalted pistachios and some salted, so I just omitted the salt in the mixture. You then remove the dry mixture and add sugar and butter to the food processor, blend until smooth, and then add an egg, vanilla, and lemon zest. Finally, you re-add the dry, nutty mixture and create a SUPER thick batter.

Here was when the beginning of my downfall began. Being the sub-par mathematician that I am (stay in school kids), I foolishly thought that instead of using a 9-inch round, I could use a 9-inch square tart pan and be fine. Wrong. The area of those two things are vastly different. I took out what I believed to be half of the mixture and spread it into a thin layer at the bottom of my tart pan and just kept a keen eye while baking to make sure it didn’t burn. It came out after 20 minutes and looked beautiful—nicely golden, firm to the touch. I was so pleased and thought I had evaded any shenanigans for this bake. Wrong.

The next step is to add the jam of your choice combined with a bit of lemon juice on top of the tart bottom you just baked. I chose raspberry because I thought it would compliment the pistachios well. You leave about a 1/2inch border on the end when spreading the jam so you can get that effect of the jam being enclosed by the tart after you add the top layer. After adding the jam, I still felt great. But then things really took a turn.

For Christmas one year, my lovely parents got me this tool that helps you to ice cakes/pipe things instead of using a pastry bag. It is plastic, super easy to fill, and then has a button you press to slowly release whatever is inside. It is wonderful and I would 10/10 recommend for ease of use and also less waste because you aren’t discarding pastry bags. I filled my little tool, chose which tip to pipe with, and then disaster struck. I maybe piped two or three lines across the tart and was out of batter. I felt so defeated, I tried to spread what I had piped to see if it would cover things (massive mistake), I yelled, I almost cried. It was not good. Then my lovely partner, looking at me with so much sympathy, said “You gotta make more batter.” He was right. I was out of pistachios so I made a quick run to the grocery store and when I came back he had cleaned everything for me and prepared all the ingredients so I could start fresh (mad props to Ben on this recipe). I made another full recipe and used all of it to pipe on the top. Just a heads up, even with this tool, piping the batter was difficult because of the thickness of it. So just go slow and if the line breaks, just keep going—it’ll still work out fine.

The completed tart bakes for about 30 minutes, just as the sides are beginning to become golden. The colour of the tart is quite pleasing, especially with the golden hints over the top, but I gotta be honest, it’s not the prettiest dessert. I don’t know what kind of piping tool magic Claire had but I don’t find the aesthetic is as easy to replicate with this recipe. Taste-wise though I really liked this tart. The jam adds some needed sweetness and moist-ness (if it’s not a word it is now) to the dessert, and the tart itself taste likes a delicious sugar cookie. You definitely get the hints of cinnamon and lemon zest in the tart; once again though, I think Claire went a bit heavy handed with her amount of citrus zest because the lemon does tend to overpower the pistachio flavour. All in all though, a fairly simple dessert (if you have the right sized dish or can do math correctly). And I always find it’s fun to bake desserts from other countries. I’d give this one 4 stars!

Julia’s Take

It’s been a great few days here in lovely Northern Ontario, with so many hot, summer days, my first official beach hang of the season, a garden that is exploding, and—at long last—a pandemic lockdown that has eased up and the opportunity for some long-awaited patio drinks with friends. I kept postponing my plans to make this week’s recipe in place of outdoor activities, but I was finally able to squeeze in some time to bake Saturday afternoon in between visits to our very-much-missed local establishments!

This week’s Pistachio Linzer Tart is an Austrian dessert that I was unfamiliar with. I have made Linzer cookies before around Christmas time, and knew that there is usually a nut-flavoured dough of some kind, and a jam of some kind. Both of those things came into play in Claire’s recipe, with toasted pistachios being blended up with flour, cinnamon, sugar, butter, egg, vanilla, and lemon zest to create a batter, and a thick layer of raspberry jam in the middle. It was a pretty straightforward bake in terms of both ingredients and process compared to the last two weeks.

The tart is baked in two rounds. Once the batter comes together, it is spread thinly into a tart pan (I tried out a new rectangular shape for this recipe, which I loved! These are the things I get excited about this days…) and then bakes for about 20 minutes. Once the tart shell has cooled, the raspberry jam, thinned out with a bit of lemon juice, gets spread over top and then the rest of the batter is piped over the jam to close in the tart. Piping has NEVER been my strong suit. I don’t know what it is—I’ve tried all kinds of different bags, tip sizes and styles, mixtures thick and thin, and I never seem to be able to control what I’m doing. Not looking promising for the Layer Cakes & Fancy Desserts chapter, but I’m bound to improve eventually. I chose a star-shaped tip in this case in hopes of creating a bit of a ridged effect on the tart similar to the picture in the book. This worked out decently well, but the batter was SO thick that it was extremely hard to get out in thin, even lines. I managed to fill in some of the breaks and gaps as I went, and the end result was pretty good, but it’s not the best looking thing I’ve ever made, that is for sure. That tart then baked for another 30 minutes—which I ended up doing in two installments of 15-minutes each because, again, it was a sunny Saturday and there are finally things to do again! No harm, no foul.

The flavour of the tart was wonderful! I used about half the amount of lemon zest the recipe called for because I learned my lesson from the extremely orangey rhubarb loaf, and the pistachio and raspberry came through so nicely. I would probably make just this tart-shell batter again and eat it on its own because it was SO delicious. The base is basically equal parts pulsed up pistachios and flour, so the nutty flavour was super prominent and it smelled amazing; it also had the best flaky texture from all the butter. The top part was a little softer than I was expecting, but I still ended up with a nice crisp from the bottom layer. Now that the world is (slowly, optimistically) starting to open up again, let’s hope the next time I eat a linzer tart, it’ll be in Austria! This was a 4-star bake for me!

Coming up next week: Claire’s Apple Tart!